
M4- On-Page SEO, Part 1
What you will learn: SEO terminology, how to optimize your individual website pages for search and how to write snippets that convert.
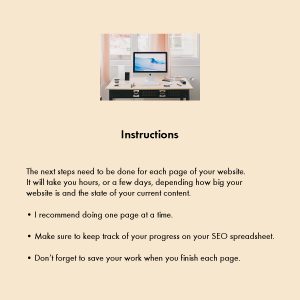
Tasks: Start optimizing your website for search. You will choose your key phrases, install Yoast, edit your slugs (if necessary), add internal and external links and optimize your content and image for search. Note: If your eyes just glazed over reading this task, don’t worry! I will walk you through everything in this module. I wrote the full task list so you can refer to it in the future.
Tool: Yoast
Read time: 45 minutes
Task time: xx minutes
WordPress
This course works, primarily, with websites that use WordPress.
Why focus on WordPress?
Two reasons:
1– WordPress is, by far, the world’s most popular Content Management System (CMS). In case you are wondering, content management systems are platforms that allow the non-technical people to create full-scale, working, professional-looking websites without coding.
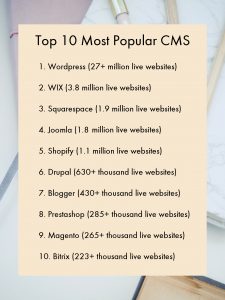
2– WordPress is the best CMS for SEO. Content Management Systems such as Wix and Squarespace make SEO a little easier than with WordPress, but it is well worth learning to optimize your site with WordPress because it is so much more powerful. But you probably know that already, which is why you are taking this course! WordPress is powerful because it plays nice with Google- it allows you to easily customize your site for mobile, it loads quickly and provides an excellent user experience if your site is built correctly. Even better, there are a number of WordPress plugins to help you with SEO. My favorite is Yoast. Later in this module we will install it and learn how it works. But first, we need to learn some technical terms.
SEO Terminology
Make sure to read them carefully because aside from having definitions, there is also important usage guidance.
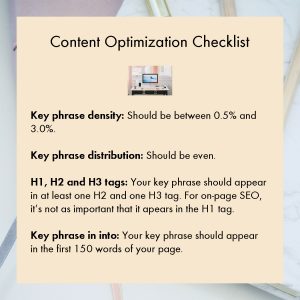
Key phrase density- The percentage of times your key phrase appears in the text on your web page. Key phrase density should ideally be between 0.5% and 3.0%.
Key phrase distribution- How your key phrase is distributed throughout the document. You want it distributed evenly. You don’t want it to appear four times in one paragraph and nowhere else on the page. The key phrase should appear in the first 150 words of your page and be distributed evenly throughout the page or post.
Key phrase stuffing- When you use the key phrase too many times. This is important for two reasons: (1) Google does not like people trying to “game the system.” If you try and put your key phrase in 10% of your text, it will penalize you. (2) As we learned in Module 1, Google’s algorithms prize quality content above all else. No one wants to read an article that is filled with the same words over and over.
Slug- The part of the url that appears after the site title. The slug of this page, for example, is: on-page-seo. If you don’t specify a slug, WordPress will create one for you from your page title. This page is a really good example of why you might want to change the slug. If I let WordPress create the slug, it is on–page-seo. The two dashes just look funny (and like an error to people that are familiar with urls), so I removed one. For SEO purposes, you want to keep the slug as short as possible. I don’t worry about that for this course because these pages are behind a paywall. In general, key phrases should be as short as possible and ideally not use words such as “a,” “the,” “and,” etc.
Stopword- Frequently appearing and irrelevant words used in search queries. For example: “a,” “the,” “and,” etc. Technically you are not supposed to use these in your slugs. However, this is becoming less important as Google becomes more sophisticated.
Headings- These come in different sizes. This largest is called H1. This is what you use for the title of your page (or blog post). The next largest is H2, which is the largest subheading size. Then there is H3, H4, H5 and H6. You don’t need to use anything smaller than H4. They have these names because, before plugins such as Yoast, you had to use the programming language HTML to display various headers, so these names are actually how one creates them in HTML. You want your key phrase to appear in your page title and at least one H2 subheading and one H3 subheading.
To better understand this, scroll up this page and look at the headings and subheadings. They are:
On-Page SEO: This is an H1 heading
WordPress: This is an H2 heading
Why focus on WordPress?: This is an H3 heading
SEO Terminology: This is an H2 heading
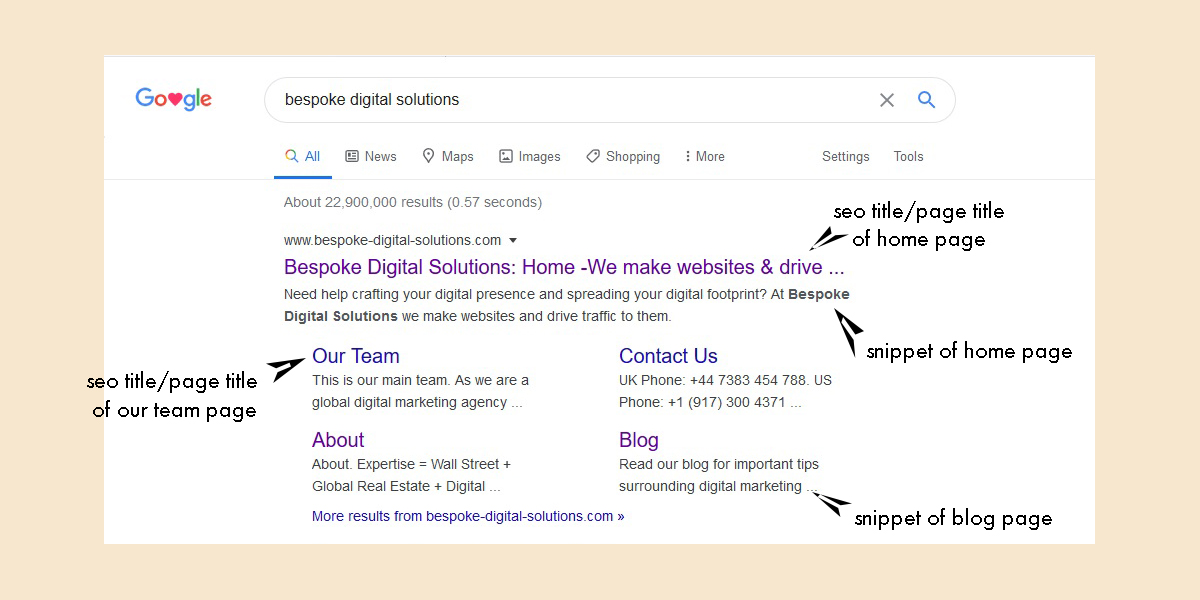
Page title, or SEO title- The first line you see displayed in a search engine result. Somewhat confusingly (and I think the reason why people are now starting to call them SEO titles), it is not just the name of the page (On-Page SEO for this page), but includes the name of the page, the name of the site and sometimes other information as well. SEO titles should be under 60 characters and contain your key phrase.
Snippet (also called a meta description)- Technically, snippets and meta descriptions are slightly different, but they are often used interchangeably. These are the short summaries that appear underneath the title tag in SERPS. The name “snippet” was originally a computer programming term. Snippets are arguably the most important part of your on-page SEO.
Alt tags- An abbreviation for what are technically called “alt attributes.” Again, the name comes from HTML. These are words that are attached to images that describe the images to web browsers (because computers don’t have eyes). If you are a photographer and selling your images, it’s worth taking the time to write a full description of the photograph. The key is to write as if you are explaining the photo to a blind person. But keep it under 125 characters. If you are not a photographer selling images, use your key phrase as the alt attribute. But don’t use it in more than 50% of your images or you might get penalized for keyword stuffing.
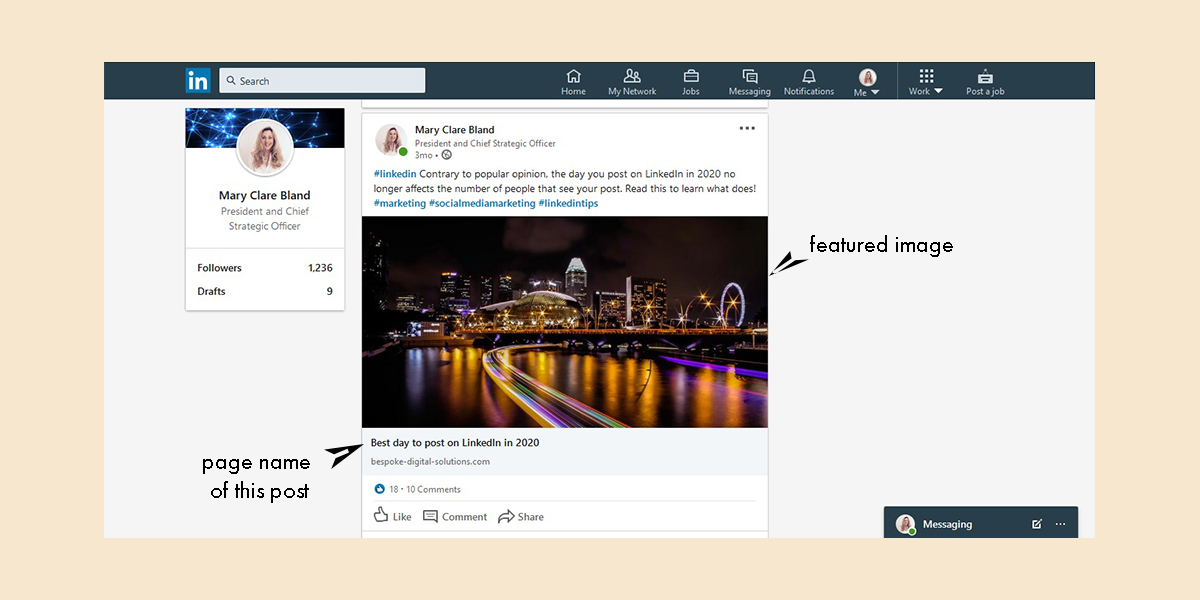
Featured image- This is the image that, in a mobile search, appears in the SERPs for a key phrase. It also appears if you share a link to the page/post on social media.
Internal links- Links to another page of your website. This is an example of an internal link. You should have at least one internal link on your page, if possible. If you are optimizing your web pages (not posts, events, galleries or portfolios), you can add a call to action and link to your content page.
Externals links- Link on your page to another website. This is an example of an external link. You should have at least one external link on your blog posts. For this course, which focuses on on-page SEO, it probably doesn’t make sense to use too many external links as you want to keep people on your website and not redirect them to others.
Secondary key phrase- When you optimize your page or post using a second key phrase. This is an advanced technique which we will cover in later courses.
Call to Action (CTA)- A piece of content intended to induce a website visitor to perform a specific act. For example: to contact you, subscribe to your newsletter or buy one of your products.

Readability- As you have learned in this course, Google values the user experience. Information should be easy to acquire and digest. For this reason, an easy to read website positively affects SEO. Since people don’t have the attention spans they used to, it is important that your pages should be easy to read. This means:
- No paragraph should be more than five lines long.
- It is ok to make one sentence paragraphs.
- Sentences should be short.
- No more than 10% of your sentences should contain passive voice.
- Make ample use of subheadings.
- Don’t use a flowery, arcane word when a simple one will do. Write like Hemingway: not F. Scott.
- The Flesch reading score of your website should not be lower than 60. Meaning, a 15 year old should be able to comprehend it.
- All images should have captions.
- Use images and graphics to hold people’s attention.
This may seem like a lot to remember but don’t worry, you don’t have to memorize anything right now. I am not even going to quiz you on these terms. Just keep this page handy, or download this list of key terms if it is easier, so you can refer to them in the future. Once we install the plugin Yoast, it will guide you through the process and act as a checklist. If you don’t understand what it is telling you to do, refer back to this terminology and it will walk you through the process.

Task: You will choose your key phrases, install Yoast, edit your slugs (if necessary), add internal and external links and optimize your content and image for search. Does this make more sense now? Yes? Look how much you just learned!
Choose your key phrases
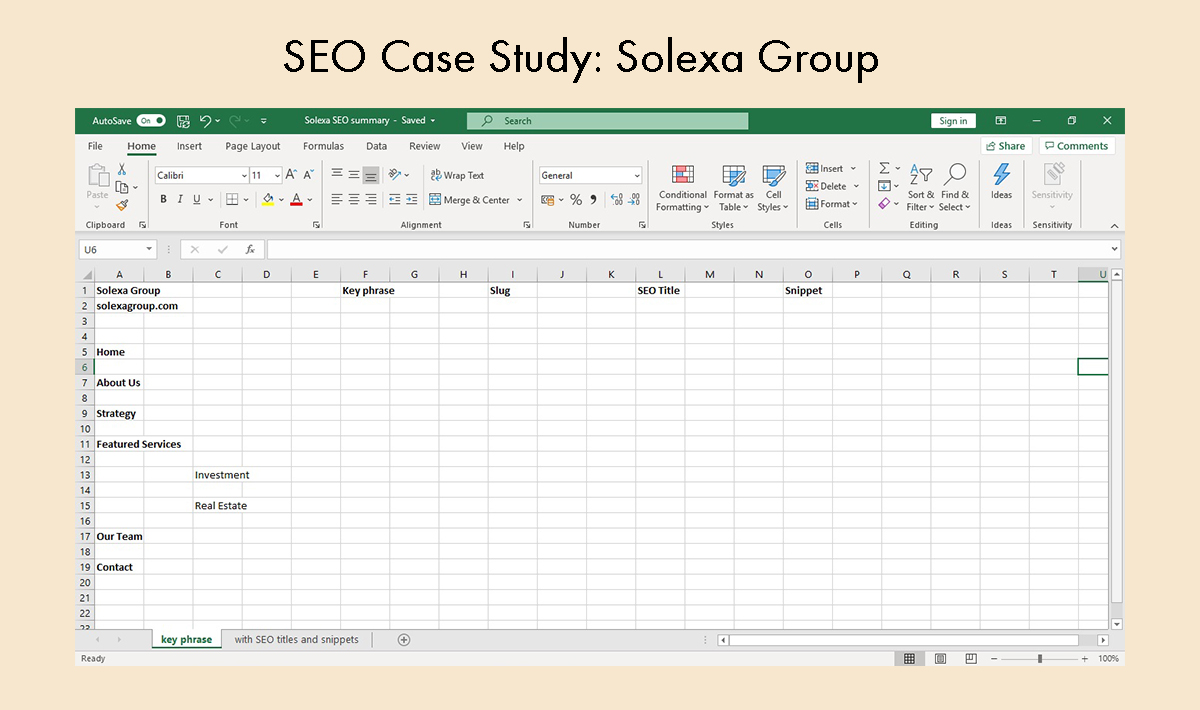
This is the moment you’ve been waiting for! We are ready to get started. I want you to make another spreadsheet. It should look like this:
Now, get out your list of key phrases. We are going to use these to fill in the column of your spreadsheet with the header “key phrase.”
Most websites have the following pages:
‣ Home
‣ About
‣ Blog
‣ Contact
‣ Larger companies often have a Team page
I recommend using the following as key phrases for these pages:
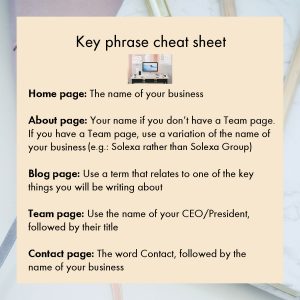
For the rest of the pages, you should use key phrases that best represent the topic of each page. You may have to rewrite your content a bit so you can use a key phrase that will generate traffic but still be consistent with your web page copy. If you are faced with very competitive key phrases, your on-page SEO will not be enough to get you ranking on the first page of the SERPS. If this pertains to you, don’t fret too much about choosing key phrases that generate a lot of traffic for your pages. The real “SEO Juice” will come when you start blogging and link building.
When you determine your key phrases, enter them into your worksheet.
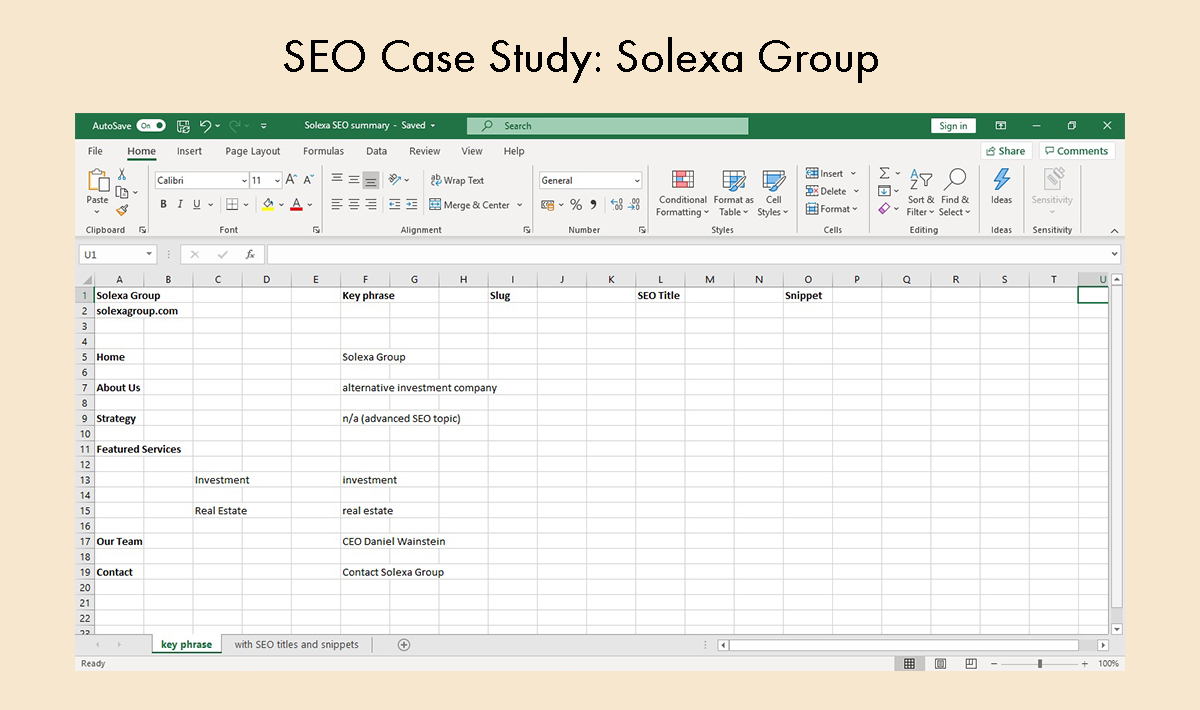
Case Study
For our case study, The Solexa Group, I used the above framework to choose the following key phrases:
Install Yoast
Video: Yoast basics
Edit your slugs
CAUTION: Before you change any slugs, keep in mind that this will break any backlinks you have to pages if you change their slugs. If you are taking this beginner course, chances are you don’t have any backlinks. If this is the case, proceed.
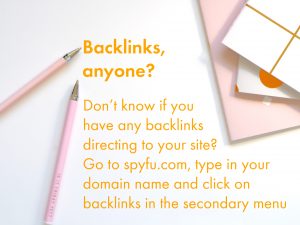
If you have backlinks, either don’t change the slugs or use one of your vouchers to contact Mary Clare and ask for advise.
Start by entering the names of all your slugs in your spreadsheet.
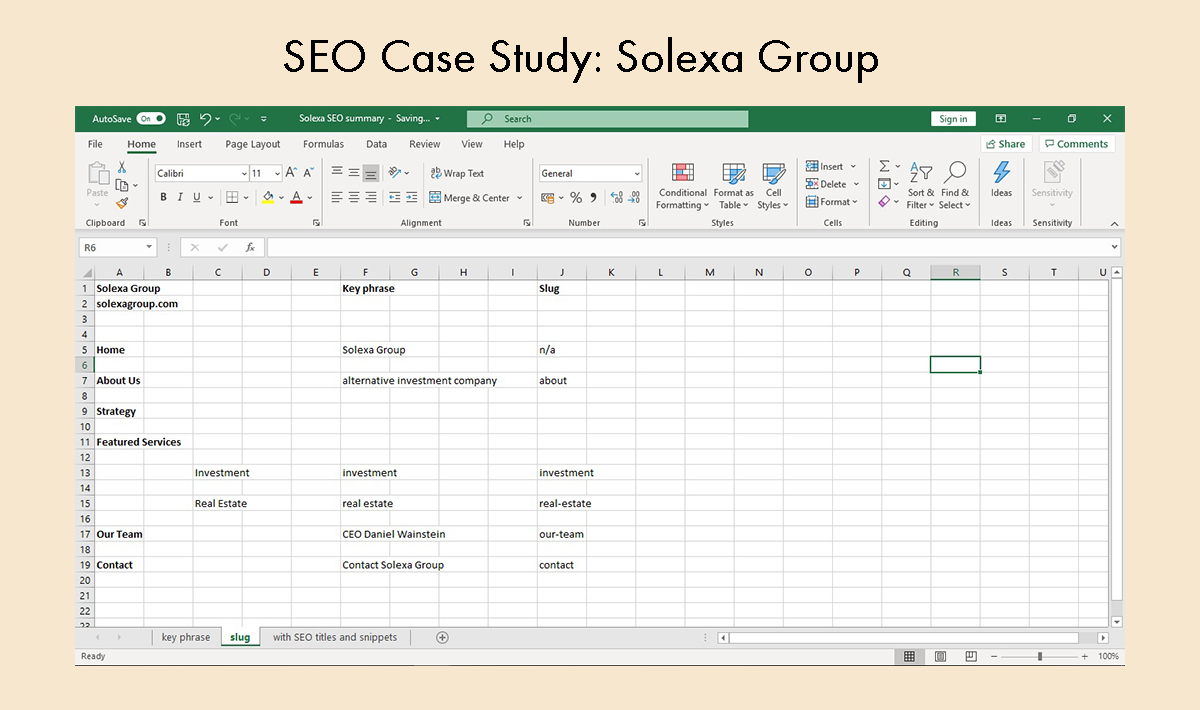
If the person that make your website knew what they were doing, the slugs likely look like the ones in our Solexa Case Study. What you are looking for are discrepancies between the names of your slugs and the names of your web pages. Keep in mind, this is about having an easy user experience, rather than key phrase optimization.
Note how in our case study, the slug for the home page is home. A rookie error is to try and put a key phrase in the slug of your home page, like this:
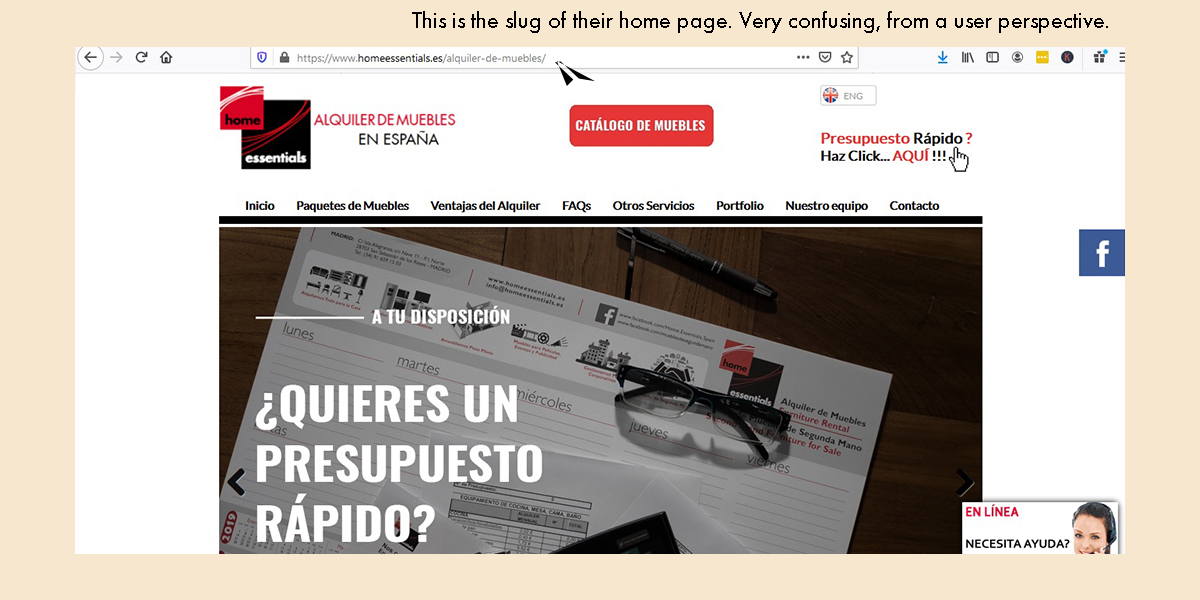
All it does is confuse users and you could possibly be penalized by Google for keyword stuffing. The same is true of your contact page and about page. You can make them contact-us or about-us, but I don’t recommend adding anymore detail than that.
If you have pages that have the same names as some of your key phrases, you can use them in your slugs, like in the Solexa Case Study.
How to change a slug
Video: How to change a slug
Add internal and external links
Ideally, you should add internal links to all your pages. If you are at a loss, you can weave them into calls to action (CTA) that link to your content page.
If appropriate, you can add external links to some of your pages. However, make sure they open in separate windows so you don’t lose traffic. It’s not as important to have external links on your pages- these are more appropriate for blog posts.
Video: How to add links
Optimize your content around your key phrase
Here is a checklist for your content optimization:
Add alt tags to your images
Add alt tags to half of your images, using the page’s key phrase as the alt tag. If you are a professional photographer, you might want to put a comma after the key phrase, then add a more detailed description of the images. Here is how you do this:
Video: How to add alt tags
Takeways
- WordPress is not only the most popular Content Management System (CMS), but it is also the best one for SEO.
- You now have a list of key SEO terms.
- You have a spreadsheet you can use to keep track of your on-page optimization.
- You know how to install and activate Yoast on your website.
- You know how to use Yoast to guide you through the basic steps of how to optimize a page or post for SEO.
- You know how to add links and alt tags to your pages and posts and how to change the slug of a page or post.
FAQS
Q1: The videos have big black blocks at the bottom, obstructing my view. Why is this happening?
A1: Sometimes the videos don’t display properly in Safari. Try viewing them in Chrome or Firefox.
Q2: How do I gauge how often to use a key phrase?
A2: Yoast will tell you if you need more or less key phrases. A good rule of thumb is use it once or twice every 300 words.